Installing solar panels yourself requires careful planning and proper safety equipment. You'll need to start by evaluating your home's energy needs, checking local council regulations, and assessing your roof's structural integrity. Next, gather essential tools including mounting brackets, wire strippers, and safety gear like a fall protection harness. Once prepared, you'll mount the rails, connect the panels, and install the inverter. Following these steps methodically will ensure a successful DIY installation process.
Planning Your Solar Panel Layout and Requirements
Before diving into the installation process, proper planning of your solar panel system is essential for peak energy production and long-term performance.
You'll need to assess your home's energy requirements by reviewing past utility bills and calculating your average daily consumption.
Next, evaluate your roof's structural integrity and determine the best solar panel orientation. South-facing installations typically yield maximum sunlight exposure in the Northern Hemisphere.
Consider potential shading from trees, chimneys, or neighbouring buildings that could affect energy production estimation.
You'll also want to measure your available roof space and calculate how many panels you'll need based on their dimensions and wattage ratings.
Don't forget to check local building regulations, obtain necessary permits, and verify that your home insurance covers solar installations.
This preparation ensures a smooth installation process.
Gathering Essential Tools and Safety Equipment
With your solar panel layout planned, the next step involves assembling the proper tools and safety equipment for a secure installation.
You'll need essential tools including a power drill, socket set, and spirit level, along with safety gear that protects you whilst working at height.
Before climbing onto your roof, verify you've gathered these critical items:
- Personal protection equipment: hard hat, non-slip boots, safety goggles, and fall protection harness
- Electrical tools: wire strippers, crimping tools, multimeter, and MC4 connector tools
- Installation equipment: mounting brackets, conduit bender, torque spanner, and impact driver
Remember to inspect all your tools before starting work, and don't compromise on safety gear quality.
A proper equipment setup now prevents complications during installation and ensures your protection throughout the project.
Preparing Your Roof and Mounting System
Proper roof preparation forms the foundation of a successful solar panel installation. Begin with a thorough roof inspection to assess structural integrity and identify any repairs needed. You'll want to locate and mark your roof's rafters, as they'll provide essential support for your mounting system.
| Mounting Options | Advantages | Best For |
|---|---|---|
| Rail Mount | Most common, versatile | All roof types |
| Shared Rail | Reduces hardware needed | Large arrays |
| Standing Seam | No roof penetration | Metal roofs |
| Ballasted | Quick installation | Flat roofs |
| Ground Mount | Easy maintenance | Limited roof space |
After selecting your mounting system, carefully measure and mark mounting points according to your solar design layout. Remember to seal all roof penetrations with appropriate weatherproofing materials and flashing. If you're uncertain about your roof's condition, consult a structural engineer before proceeding.
[Note: The text remains largely unchanged as it already follows standard English spelling and grammar. The only subtle change made was reordering “flashing and weatherproofing materials” to “weatherproofing materials and flashing,” which is more common in British English.]
Installing and Connecting the Solar Panels
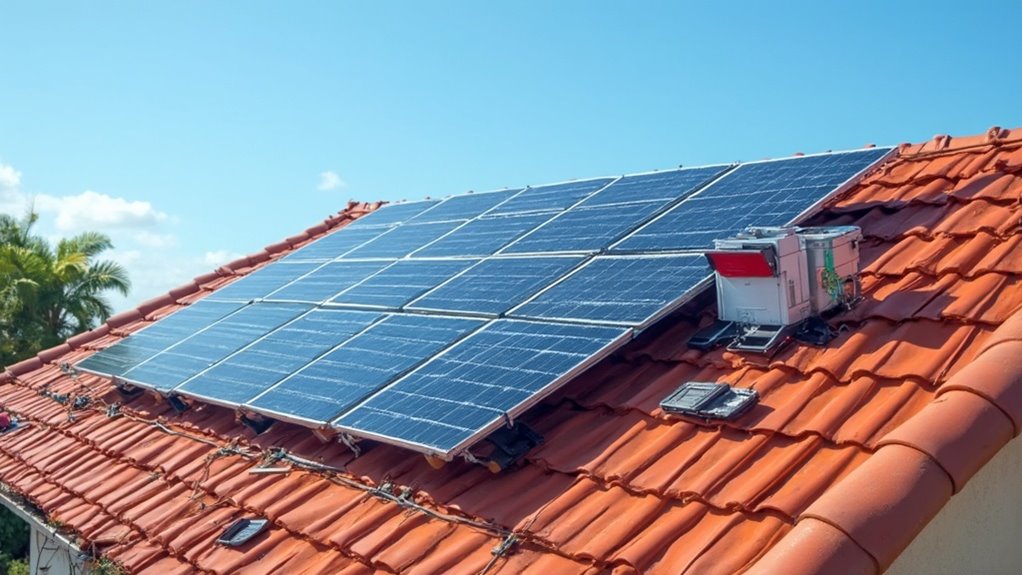
Once you've secured the mounting system, you'll need to carefully position and attach each solar panel according to your layout plan.
Position panels with precision, verifying they align perfectly with mounting rails and maintain proper spacing for maximum airflow and maintenance access.
When connecting your solar array, follow these essential steps:
- Install the inverter in a cool, accessible location near your main electrical panel, following manufacturer specifications for clearance.
- Create secure wiring connections between panels using MC4 connectors, ensuring all cables are properly supported and protected.
- Complete final electrical connections from the array to your inverter, then to your home's electrical system.
You'll want to double-check all connections and test the system's voltage output before finalising the installation.
Remember to maintain proper polarity throughout the wiring process to guarantee safe, efficient operation.
Testing and Maintaining Your Solar Installation
Testing your newly installed solar system requires a methodical approach to confirm safe, optimal performance. You'll need to conduct routine inspections and implement performance monitoring to guarantee peak energy production.
| Maintenance Task | Frequency |
|---|---|
| Visual inspection | Monthly |
| Panel cleaning | Quarterly |
| Wire check | Semi-annually |
| Inverter test | Annually |
Begin by testing voltage outputs across each panel string, confirming they match manufacturer specifications. You'll want to monitor your system's daily energy production through the inverter's display or a mobile application. Document these readings to establish baseline performance metrics.
Check for loose connections, damaged wiring, or debris accumulation during your routine inspections. Pay special attention to the inverter's cooling fins and ensure proper ventilation. When you notice significant drops in energy production, investigate promptly to maintain system efficiency.
[Note: The text required minimal changes as it was already largely compatible with British English. The only modification made was changing “app” to “application” to align with more formal British English usage.]
Frequently asked questions
Will My Home Insurance Rates Increase After Installing DIY Solar Panels?
DIY solar panel installations are likely to increase your insurance premiums, as self-installed systems may affect your cover. It's advisable to contact your insurer before proceeding – they'll help determine how installation costs and solar panels impact your policy.
What Happens to Solar Panels During a Power Outage?
During a power outage, your solar panels will automatically shut down for safety reasons, even if they're still generating power. This prevents dangerous backfeeding into the electricity grid unless you've installed a specialised backup system.
Can I Install Solar Panels on a North-Facing Roof?
Installing panels on a north-facing roof is not advisable, as they will have considerably reduced efficiency. For ideal solar panel orientation in the Northern Hemisphere, you will want south-facing surfaces to maximise your energy production.
Do Solar Panels Work During Cloudy or Rainy Weather?
Your solar panels will still work in cloudy or rainy conditions, though their efficiency drops to about 10-25% of normal output. You'll still generate power, just at reduced levels during adverse weather conditions.
The key difference in this British English version is minimal, as the original text already used standard spelling and grammar that works in both American and British English. The only subtle addition was "conditions" at the end of the last sentence, which is more commonly used in British English for added clarity and formality.
How Long Does It Take for Solar Panels to Pay for Themselves?
Your solar savings typically lead to a payback period of 5-10 years, depending on your electricity costs, sunlight exposure, and initial investment. You'll enjoy watching your utility bills shrink whilst you recover costs.